
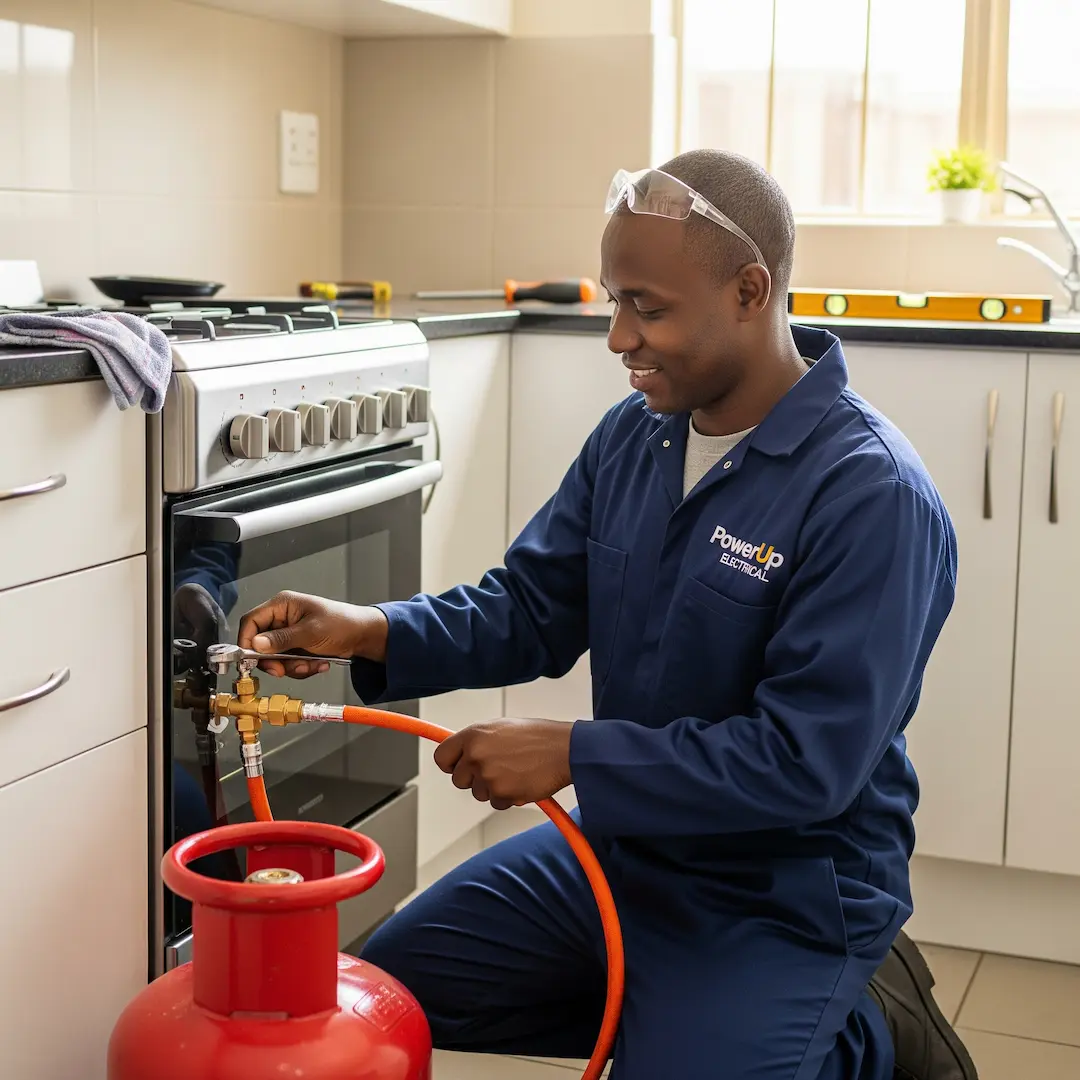
LPG Gas Stove Installation in SA: Safety, Ventilation & Compliance Requirements
Considering an LPG gas stove in South Africa? Learn why safe installation, proper ventilation, and regulatory compliance matter—and why certified professionals are essential to avoid risks and ensure reliable cooking.

Thinking about switching to an LPG gas stove in your South African home? It's a fantastic choice for many reasons, from continuous cooking during load shedding to precise heat control. However, unlike simply plugging in an electric appliance, gas stove installation requires careful attention to safety, proper ventilation, and strict adherence to South African regulations. Getting it wrong can have serious consequences, which is why understanding the compliance requirements and relying on qualified professionals is absolutely crucial.
Why South African Regulations Matter
In South Africa, gas installations are governed by the South African National Standard (SANS) 10087-1, specifically addressing "The handling, storage, distribution and maintenance of liquefied petroleum gas in domestic, commercial, and industrial installations." This standard is not just a guideline; it's a legal requirement designed to ensure your safety and that of your property. Any installation that doesn't comply could void your home insurance and, more importantly, pose significant risks like gas leaks, fires, or even explosions. This is why having a Certificate of Conformity (CoC) issued by a registered gas installer is non-negotiable.
The Critical Role of an SAQCC Gas Registered Installer
You might be handy with tools, but when it comes to gas, DIY is a definite no-go. South African law explicitly states that all gas installations, repairs, and maintenance must be carried out by a SAQCC Gas registered installer.
What does SAQCC Gas mean for you?
SAQCC Gas (South African Qualification & Certification Committee for Gas) is the body mandated by the Department of Employment and Labour to register and authorise gas practitioners in South Africa. When you choose an SAQCC Gas registered installer, you're getting someone who:
- Has undergone rigorous training and passed the necessary assessments.
- Is knowledgeable about the latest SANS 10087-1 standards.
- Is legally permitted to work on gas systems and issue a CoC.
One of our experienced installers recently recounted a situation where a homeowner had attempted a self-installation, using unapproved flexible hoses and incorrectly placed gas cylinders. "It looked fine on the surface," he explained, "but a simple leak test revealed multiple points of failure. The homeowner was incredibly lucky there hadn't been an incident. We had to dismantle the entire setup and re-install it from scratch, which ultimately cost them more than if they had called a professional in the first place." This kind of scenario underscores why expertise and adherence to regulations are paramount.
Understanding Gas Bottle Connection and Placement
The proper connection and placement of your LPG gas bottle are fundamental to the safety of your installation. This isn't just about convenience; it's about preventing dangerous gas build-up in case of a leak.
Correct Gas Bottle Connection:
- Regulator: The gas bottle connects to your stove via a pressure regulator and an approved flexible gas hose. The regulator reduces the high pressure of the gas in the cylinder to a safe, usable pressure for your appliance.
- Hose: The flexible gas hose must be specifically approved for LPG use and should not exceed 2 metres in length. Crucially, this hose cannot pass through any partitions, including cupboard walls, wooden panels, or drywall. It must be visible and accessible for inspection.
- Leak Testing: After connection, a registered installer will perform a thorough leak test using a gas leak detection spray or solution to ensure all connections are secure and gas-tight. This is a standard procedure and an essential safety check.
Gas Bottle Placement: The Golden Rules
SANS 10087-1 outlines strict regulations for the placement of LPG gas cylinders, whether indoors or outdoors. The general principle is to minimise the risk of gas accumulation in enclosed spaces and to keep cylinders away from ignition sources.
Outdoor Placement (Recommended and Most Common):
- Distance from openings: Gas cylinders must be placed at least 1 metre horizontally from any doors or windows.
- Distance from drains/vents: A minimum of 2 metres away from any drains or air vents where gas could collect.
- Distance from electrical points: At least 5 metres horizontally from any electrical switch, plug, motor, or other ignition source (excluding light bulbs, which must be at least 1.5 metres above the bottles).
- Distance from boundary walls: A minimum of 1 metre from your property's boundary wall, unless the wall is a double-brick firewall (at least 1.8m tall with no ventilation gaps).
- Below windows: Cylinders cannot be placed directly below windows unless there is a non-combustible roof or canopy installed between the window and the cylinder, with a minimum distance of 300mm between the bottom of the window and the top of the bottle.
- Ventilation: Always in a well-ventilated area, away from direct sunlight.
Indoor Placement (Limited and with Strict Conditions):
While less common for household stoves, some smaller cylinders can be placed indoors under very specific conditions, as per SANS 10087-1. These often apply to smaller, portable appliances, but for fixed gas stoves, external placement is generally preferred for safety. If an indoor installation is necessary (e.g., a small cylinder within a ventilated cupboard for a hob), the following apply:
- No larger than 9kg: Generally, internal cylinders are limited to smaller sizes.
- Ventilated cupboard: The cupboard must have permanent ventilation openings at both the top and bottom to allow for air circulation and the dispersal of any gas.
- Distance from appliance: The cylinder cannot be closer than 300mm from the gas hob itself.
- No electrical connections: No electrical plug points or switches are permitted within the same cupboard as the gas cylinder.
- Not in food storage: Cylinders cannot be installed in pantries or other food storage areas.
- Not above appliance: A cylinder cannot be installed above the cooking or heating appliance.
Our installers often advise clients to choose outdoor placement for larger cylinders, even if it means running a longer gas line. "It adds a bit to the initial cost," one installer noted, "but the peace of mind knowing the cylinder is safely outdoors, especially with children or pets around, is invaluable."
Essential Ventilation Requirements
Beyond cylinder placement, proper ventilation within your kitchen is paramount for a gas stove. Gas combustion consumes oxygen and produces carbon monoxide, which is odourless and highly dangerous. Adequate ventilation ensures fresh air supply for efficient combustion and safely removes combustion by-products and any potential gas leaks.
- General Room Ventilation: Your kitchen should have good general airflow. This can be achieved through open windows, especially when cooking.
- Extractor Fan/Hood: An extractor fan or cooker hood installed above your gas stove is highly recommended. It pulls away cooking fumes, steam, and critically, any combustion gases. Ensure the extractor fan is correctly sized for your kitchen and installed at the manufacturer's recommended height, which is typically higher for gas hobs than for electric ones due to flame safety.
- Avoid Sealing: Never seal off doors, windows, or ventilation grilles when using an unflued gas appliance indoors.
- Ducting: If you have an integrated extractor, ensure it is ducted to the outside. Venting into a ceiling space or closed cupboard can lead to grease build-up and is a fire hazard.
One of our expert installers shared a case where a new kitchen was fitted, and the homeowner, without proper advice, had an integrated extractor that was simply venting into the cupboard above the hob. "When we did the compliance check," he said, "we immediately spotted the issue. Not only was it ineffective at clearing cooking fumes, but it created a fire risk with grease accumulating in an enclosed space. We had to re-route the ducting to the exterior, which was a more involved job than if it had been planned correctly from the start."
What to Expect During an Installation (Example Job: Install Gas Stove)
When a registered SAQCC Gas installer comes to install your LPG gas stove, here's a general overview of what the "Install a new 150L geyser" process entails, though the specific job is an "Install gas stove (LPG)":
- Assessment: The installer will first assess your kitchen layout, the location of your gas cylinder (or proposed location), and the route for the gas piping. They'll consider distances from electrical points, windows, and boundary walls, ensuring compliance with SANS 10087-1.
- Piping Installation: Approved gas piping (typically Class 1 or 2 copper pipe, which is thicker than plumbing copper) will be run from the gas cylinder to the stove. If any copper pipes need to pass through walls, they will be properly sleeved for protection.
- Appliance Connection: The gas stove will be securely connected to the gas supply line using an approved flexible gas hose, ensuring all connections are tight.
- Ventilation Check: The installer will verify that adequate ventilation is in place, whether through existing windows, an extractor fan, or by recommending appropriate ventilation solutions.
- Safety Device Installation: An easily accessible shut-off valve will be installed near the stove, allowing you to quickly turn off the gas supply in an emergency.
- Leak Detection: Every single connection will be thoroughly checked for leaks using a special solution or electronic detector.
- Functional Test: The installer will test the stove to ensure all burners ignite correctly and function safely.
- Certificate of Conformity (CoC): Upon completion and verification that the installation meets all SANS 10087-1 standards, the registered installer will issue you with a valid Gas Certificate of Conformity. This document is your proof of a safe and compliant installation and is essential for insurance purposes and when selling your property.
Disclaimer: While this guide provides valuable information, attempting to install a gas stove yourself is against South African law and highly dangerous. Always use a qualified and SAQCC Gas registered professional for any gas installations or repairs.
Frequently Asked Questions
Do I need a Certificate of Conformity (CoC) for my LPG gas stove installation?
Yes, absolutely. A Certificate of Conformity (CoC) is a legal requirement in South Africa for all new gas installations, including LPG gas stoves. It proves that your installation complies with the South African National Standards (SANS 10087-1) and is crucial for safety and insurance purposes. Only an SAQCC Gas registered installer can issue this certificate.
Where should I place my LPG gas cylinder?
For safety reasons and compliance with SANS 10087-1, it is highly recommended to place your LPG gas cylinder outdoors in a well-ventilated area. There are specific distance requirements to adhere to, including distances from doors, windows, drains, electrical points, and boundary walls. Indoor placement for gas stoves is generally not recommended for safety reasons, and if done, is subject to extremely strict ventilation and cylinder size limitations.
What kind of ventilation is required for a gas stove?
Proper ventilation is essential for any gas stove to ensure the safe dissipation of combustion by-products like carbon monoxide and any potential gas leaks. This typically includes good general room ventilation (e.g., open windows) and the installation of an extractor fan or cooker hood above the stove, which should be ducted to the outside.
Can I connect my LPG gas bottle to the stove myself?
No, you cannot. In South Africa, it is a legal requirement that all gas installations, including the connection of gas bottles to appliances and associated piping, must be carried out by a qualified and SAQCC Gas registered installer. Attempting a DIY installation is illegal, dangerous, and will void your home insurance.
Find a vetted electrician near you
LPG gas appliance installation: find a pro near you
- LPG gas appliance installation near you
- LPG gas appliance installation in Johannesburg
- LPG gas appliance installation in Sandton
- LPG gas appliance installation in Midrand
- LPG gas appliance installation in Roodepoort
- LPG gas appliance installation in Randburg
- LPG gas appliance installation in Pretoria
- LPG gas appliance installation in Cape Town
Suzette Meyer is the lead author and content creator for Kandua.com, South Africa’s #1 marketplace for home services. Suzette has made it her mission to help homeowners with advice on all aspects of home repair, maintenance and improvement, including how to choose the right Pro and how to make smart upgrades that improve your resale value or save costs.

Latest articles, advice and more
.webp)
.webp)
.jpeg)
Sinking Pavers, Weeds and Water That Pools: What Your Driveway Is Telling You
When your driveway starts sprouting weeds, pooling water, or sinking in patches, the bricks are not failing you. The layers underneath have moved, and they are trying to tell you exactly what went wrong.
.jpeg)
What Your Garage Door Motor Actually Does (And Why It Breaks)
Spoiler alert: your garage door motor isn't actually doing the heavy lifting. The torsion springs carry almost all the weight. The motor simply pushes, pulls, controls the descent so it doesn't slam, and acts as a lock when the door is shut. That’s why a relatively small box on your ceiling can move such a massive door. Want to test this? Pull the red manual release cord and lift the door by hand. If it glides up easily and stays put when you let go, your springs are doing their job, and the fault lies with the motor. If the door feels like dead weight or slams back down- stop. You’ve got a spring problem.
.jpeg)
4 Warning Signs Your Tiles Are Failing (And What They Mean)
Tiles rarely fail overnight. They warn you first. A hollow sound underfoot, grout that crumbles away, a tile that lifts at one edge, or a crack that runs across two tiles all point to something happening under the surface. Here is what each sign means, and how urgent it is.
.webp)
.webp)
Beyond the Unboxing: A Detailed Guide to Correct Washing Machine Plumbing & Setup
New washing machine in South Africa? Learn essential plumbing and setup tips to prevent leaks, ensure efficient operation, and extend your appliance’s lifespan - expert advice before your first load.
.webp)
New Washing Machine? Don't Plug It In Yet! Essential Installation Tips for SA Homes
Installing a new washing machine? Learn the essential setup steps South African homeowners often overlook to prevent leaks, noise, and damage—and ensure efficient, long-lasting performance from day one.
.webp)
.webp)
%25201200%2520x%25201200%2520(1).jpeg)
What Retiling a Bathroom Costs in 2026, Room by Room
Retiling a bathroom in South Africa costs between R230 and R800 per square metre in 2026, including materials and labour. A standard family bathroom, stripped and fully retiled, usually lands between R11,800 and R27,500. A guest toilet costs a fraction of that. A large porcelain en-suite costs a lot more.
How to Install a Horizontal Geyser | Step-by-Step Pro Guide
Want to install a geyser like a pro? This step-by-step tutorial shows you exactly how to do a horizontal Ariston Axios geyser installation, straight from the BluLever plumbing workshop. 🎥 Hosted by MK, BluLever’s technical facilitator, and supported by a qualified electrician, Life and a BluLever graduate artisan, Zinhle. This is your ultimate guide to a SANS 10254-compliant installation — from preparing the wall, to plumbing, electrical wiring, and pro troubleshooting tips.
How to Maintain a Geyser | Step-by-Step Pro Guide
Want to maintain a geyser like a pro? This step-by-step tutorial shows you exactly how to do the three core geyser maintenance checks on an Ariston Axios geyser installation, straight from the BluLever plumbing workshop. 🎥 Hosted by MK, BluLever’s technical facilitator, and supported by a qualified electrician, Life. This is your ultimate guide to geyser maintenance — from diagnosing the problem to checking the heat regulation of the geyser, to pressure regulation and then finally corrosion protection.
%201.avif)
Not just another newsletter. It's an advantage