
New Washing Machine? Don't Plug It In Yet! Essential Installation Tips for SA Homes
Installing a new washing machine? Learn the essential setup steps South African homeowners often overlook to prevent leaks, noise, and damage—and ensure efficient, long-lasting performance from day one.

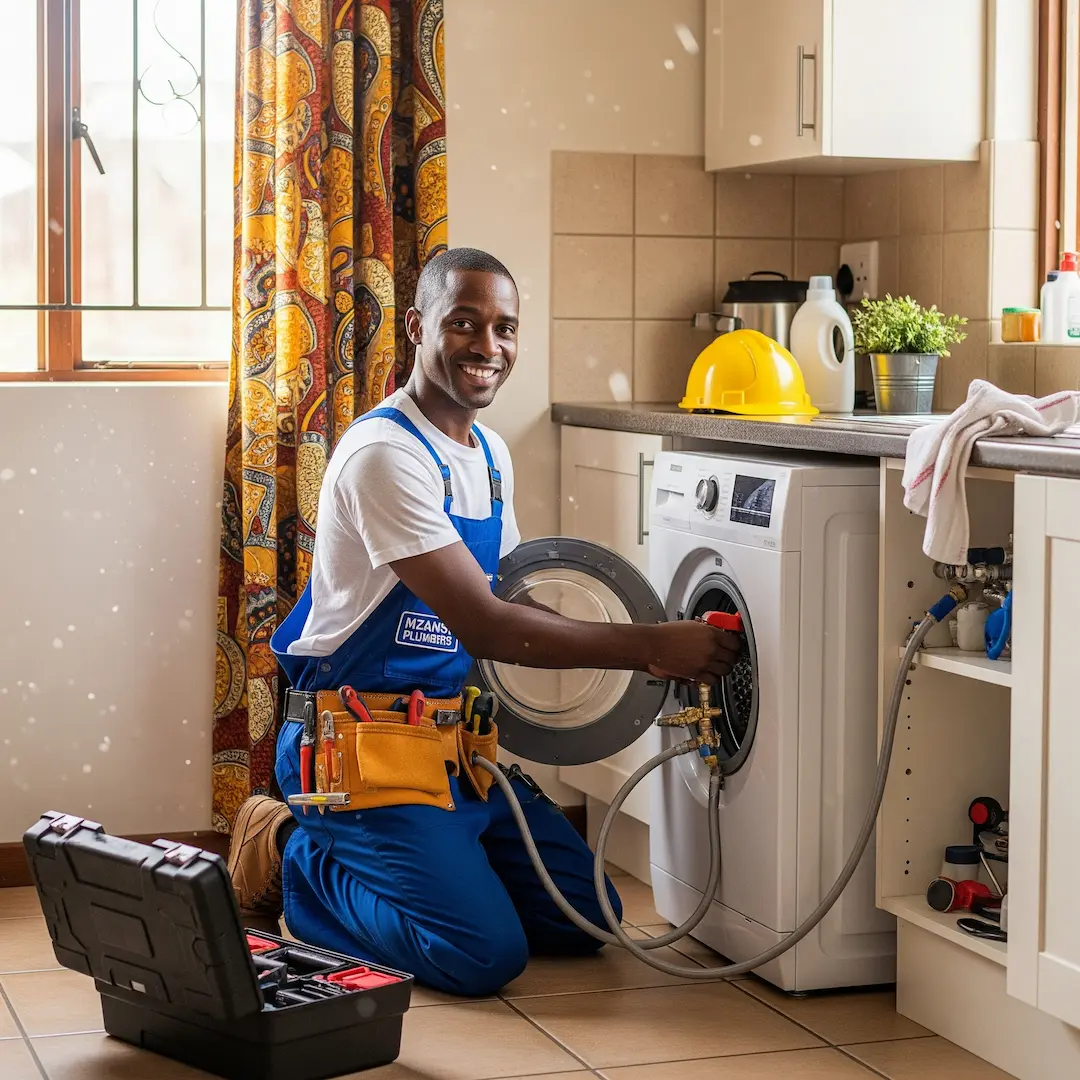
That new washing machine box sitting in your kitchen or scullery is a beautiful sight. It promises cleaner clothes, less time spent at the laundromat, and a little more convenience in your busy life. Before you tear it open, plug it in, and throw in your first load of laundry, take a deep breath. A successful laundry day starts with a successful installation, and unfortunately, this is where many things can go wrong.
Getting the setup right from the start not only ensures your machine runs efficiently but also prevents noisy operation, water damage, and even permanent damage to your new appliance. We’ve spoken with professional plumbers across South Africa who have seen it all, and they agree: a few simple, often-overlooked steps are the key to a long and happy relationship with your washing machine.
First and Foremost: Remove the Transit Bolts
This is, without a doubt, the most common and most destructive mistake homeowners make. A plumber in Johannesburg once shared a story about a call-out for a brand-new machine that was "possessed." On its first spin cycle, it was vibrating so violently it literally ‘walked’ across the room, making a sound like a helicopter landing. The cause? The transit bolts were still in place.
- What are they? Transit bolts (or shipping bolts) are long, sturdy bolts, usually found at the back of the machine. They are installed at the factory to lock the drum in place and prevent it from bouncing around and getting damaged during transport.
- Why must they be removed? The drum needs to float and move freely during a wash cycle. If the transit bolts are left in, the drum is held rigid. When the machine hits its high-speed spin cycle, the immense force has nowhere to go, leading to violent shaking, terrifying noises, and potential damage to the drum, suspension, and motor.
- How to remove them:Look at the back of your washing machine. You should see 3 to 5 bolts, often with plastic spacers.
- Use a spanner or wrench to loosen and completely remove each bolt.
- Your machine will have come with small plastic caps. Use these to plug the holes left by the bolts.
- Keep the bolts! If you ever move house, you’ll need to reinstall them to transport the machine safely.
It’s All About the Base: Getting Your Machine Perfectly Level
Once the transit bolts are out, your next priority is ensuring the machine is perfectly stable and level. An unlevel machine is an unhappy machine. It will vibrate, knock, and over time, the excessive movement can cause premature wear on the bearings and suspension components, shortening its lifespan.
The ideal spot is a solid, flat floor, like concrete or tiles. Avoid placing it on a springy wooden floor if possible, as this can amplify vibrations.
Here’s how to get it right:
- Use a Spirit Level: Don't just eyeball it. Place a spirit level on top of the machine. Check it from front-to-back and from side-to-side.
- Adjust the Feet: Most washing machines have adjustable feet at the front, and sometimes at the back too. You can usually twist these by hand or with a wrench to raise or lower each corner of the machine until the bubble on your spirit level is perfectly centred.
- The Wobble Test: Once you think it's level, try to rock the machine by pushing down on its top corners diagonally. There should be absolutely no wobble or movement. If there is, one of the feet isn’t making firm contact with the floor and needs a final adjustment.
Making the Right Connections: The Water Supply
Connecting the water seems straightforward, but a small mistake here can lead to a big, wet problem.
- Always Use the New Hoses: Your new machine came with new inlet hoses for a reason. Do not be tempted to reuse the old ones. Over time, the rubber in hoses perishes, becomes brittle, and the internal mesh can weaken. An old hose bursting is one of the most common causes of household water damage.
- Check the Washers: Ensure the small black rubber washer is properly seated inside the coupling at each end of the hose before you start screwing it on. This little washer is what creates the watertight seal.
- Hand-Tighten First: To avoid cross-threading the plastic fittings, always screw the hose on by hand first. It should turn easily.
- A Gentle Nip, Not a Mighty Crank: Once hand-tight, use a pair of pliers to give it a final quarter-turn. Overtightening can crack the plastic coupling or crush the rubber washer, which will cause a leak.
- Turn on the Tap Slowly: Once connected, open the water tap just a little at first. Check for any drips at the tap end and at the machine end. If all is dry, you can open the tap fully. Most modern machines in South Africa are "cold fill" only, meaning you only need to connect one hose to the cold water tap.
Don’t Get Drained: Setting Up the Drainage Hose
A secure drain hose is the final piece of the puzzle. An improperly secured hose can easily pop out of its drain during a vigorous spin cycle, emptying litres of soapy water all over your floor. Our network of plumbers has heard this story countless times.
You generally have two options for drainage in a South African home:
- A Standpipe: This is a dedicated, open-topped vertical pipe, usually about 40-50mm in diameter.
- Use the U-shaped plastic guide that came with the drain hose. This hooks the hose over the edge of the pipe, preventing it from being pushed in too far (which can cause siphoning) or slipping out.
- Do not create an airtight seal around the hose. The gap allows air to enter, which prevents a vacuum from forming and ensures water drains away properly.
- Under a Sink: Many kitchens and sculleries have a connection point (a spigot) on the sink's U-bend or trap.
- If using one of these for the first time, you may need to cut or remove a plastic blanking cap from the end of the spigot.
- Push the drain hose firmly onto the spigot and secure it with a hose clamp to ensure it can't be forced off by water pressure.
Crucial Tip: The highest point of your drain hose (the "hook") should be between 60cm and 100cm from the floor. If it's too low, water can siphon out of the machine during the cycle. If it's too high, the machine's pump will struggle to empty the water.
A Quick DIY Safety Reminder
This guide covers the standard installation process. If your space requires new plumbing, like installing a new tap or standpipe, or if you are unsure about any of these steps, it is always safest to call a qualified plumber. A small professional fee is far better than the cost of repairing water damage or a broken appliance.
Frequently Asked Questions
Do I really need to use the new hoses that came with the machine?
Yes, absolutely. Rubber and plastic degrade over time. Old hoses are a significant risk for bursting under pressure, which can cause serious flooding. The new hoses are designed to match your machine's specifications and are your best protection against leaks.
My machine shakes violently, but I've removed the transit bolts. What's wrong?
If the transit bolts are definitely out, the cause is almost certainly that the machine is not perfectly level. Get a spirit level and re-check it, adjusting the feet until it's stable. Another common cause is washing a single, heavy item (like a big towel or a duvet) which can unbalance the load.
Can I connect my washing machine to a hot water tap?
You should check your appliance's user manual, but the vast majority of modern washing machines sold in South Africa are cold-fill only. They are designed to heat water internally to the precise temperature required for each cycle. Connecting a cold-fill machine to a hot water supply can confuse its sensors and potentially damage its internal components.
What's that funny plastic smell during the first wash?
This is usually normal for a brand-new appliance. It's often the smell of new plastic and rubber components, or protective coatings on the heating element, burning off for the first time. The best way to get rid of it is to run a hot, empty "maintenance wash" or "tub clean" cycle before you do your first load of laundry.
Suzette Meyer is the lead author and content creator for Kandua.com, South Africa’s #1 marketplace for home services. Suzette has made it her mission to help homeowners with advice on all aspects of home repair, maintenance and improvement, including how to choose the right Pro and how to make smart upgrades that improve your resale value or save costs.

Related articles, advice and more
.webp)
What Does a Plumbing Call-Out Fee Usually Include?
When that familiar drip-drip-drip starts under the kitchen sink or your geyser begins a slow weep in the ceiling, the first thing most South African homeowners do is pick up the phone. But before a wrench even touches a pipe, you’ll likely hear the term "call-out fee."
.jpg)
How to Choose Between Repair and Replacement for Your Geyser
Deciding between repairing and replacing isn't just about the immediate price tag. It is about safety, long-term electricity savings, and compliance with South African building regulations. Based on insights from vetted plumbers across Johannesburg, Cape Town, and Durban, this guide will help you navigate that decision with confidence.
.jpg)
What to Do If Your Electric Problem Comes Back After Repair
There are few things more frustrating than paying for a repair only to have the lights flicker, the breaker trip, or the plug point fail again a few days later. Here is a step-by-step guide to handling the situation professionally, safely, and effectively to get it sorted out for good.
.jpg)
Understanding Geyser Warranties in South Africa
For most South African households, the geyser is the hardest-working appliance in the home. To help you protect your investment, we have broken down exactly how Geyser warranties work in South Africa, drawing on insights from qualified plumbers who handle rejected claims daily.
.webp)
How Hard Water Damages Your Plumbing (and What to Do About It)
If you suspect you have hard water, you are in the "awareness" stage of a very important journey for your home's maintenance. Ignoring it can lead to burst geysers and clogged pipes. This guide, compiled with insights from top local plumbers, will explain exactly how hard water affects your plumbing and the practical steps you can take to fix it.
.webp)
.webp)
.webp)
Latest articles, advice and more
%20(1).webp)
%20(1).webp)
.webp)
How to Check If an Electrician Is Registered with ECB
The Electrical Conformance Board of South Africa (ECB) serves as a vital gatekeeper in this industry. If you are in the middle of a renovation or just need a new DB board installed, knowing how to verify your electrician’s registration is the most important step you can take.
What Does a Plumbing Call-Out Fee Usually Include?
When that familiar drip-drip-drip starts under the kitchen sink or your geyser begins a slow weep in the ceiling, the first thing most South African homeowners do is pick up the phone. But before a wrench even touches a pipe, you’ll likely hear the term "call-out fee."
How to Choose Between Repair and Replacement for Your Geyser
Deciding between repairing and replacing isn't just about the immediate price tag. It is about safety, long-term electricity savings, and compliance with South African building regulations. Based on insights from vetted plumbers across Johannesburg, Cape Town, and Durban, this guide will help you navigate that decision with confidence.
.webp)
Beyond the Unboxing: A Detailed Guide to Correct Washing Machine Plumbing & Setup
New washing machine in South Africa? Learn essential plumbing and setup tips to prevent leaks, ensure efficient operation, and extend your appliance’s lifespan - expert advice before your first load.
.webp)
New Washing Machine? Don't Plug It In Yet! Essential Installation Tips for SA Homes
Installing a new washing machine? Learn the essential setup steps South African homeowners often overlook to prevent leaks, noise, and damage—and ensure efficient, long-lasting performance from day one.
.webp)
TV Repair Costs in South Africa: Diagnosing Screen, Power & Component Issues
Find out what TV repairs really cost in South Africa – from call-out and diagnosis fees to screen, power and main board fixes – and when it’s cheaper to replace your TV instead of repairing it.
.webp)
Septic Tank Leak Repair Cost in South Africa: Addressing Odours & Environmental Hazards
Learn typical septic tank leak repair costs in South Africa, what drives the price up, how to spot early warning signs (odours, soggy ground, backups), and when it’s safer and cheaper to get a professional in.
.webp)
Hidden Water Leak Detection Cost in South Africa: Non-Invasive Solutions
Discover what hidden water leak detection really costs in South Africa – from acoustic and thermal imaging to tracer gas – and when it’s worth calling a non-invasive leak detection specialist to avoid massive water damage and repair bills.
How to Install a Horizontal Geyser | Step-by-Step Pro Guide
Want to install a geyser like a pro? This step-by-step tutorial shows you exactly how to do a horizontal Ariston Axios geyser installation, straight from the BluLever plumbing workshop. 🎥 Hosted by MK, BluLever’s technical facilitator, and supported by a qualified electrician, Life and a BluLever graduate artisan, Zinhle. This is your ultimate guide to a SANS 10254-compliant installation — from preparing the wall, to plumbing, electrical wiring, and pro troubleshooting tips.
How to Maintain a Geyser | Step-by-Step Pro Guide
Want to maintain a geyser like a pro? This step-by-step tutorial shows you exactly how to do the three core geyser maintenance checks on an Ariston Axios geyser installation, straight from the BluLever plumbing workshop. 🎥 Hosted by MK, BluLever’s technical facilitator, and supported by a qualified electrician, Life. This is your ultimate guide to geyser maintenance — from diagnosing the problem to checking the heat regulation of the geyser, to pressure regulation and then finally corrosion protection.
%201.avif)
Not just another newsletter. It's an advantage


From problem to solved


.svg)