
Solar Backup Power Installation in SA: Connecting Panels, Inverters & Batteries for Seamless Load Shedding Relief
Curious how solar backup power is installed in South Africa? Explore the step-by-step process - from site assessment to safe integration - and learn why expert installation ensures reliable, seamless power during load shedding.

South Africa's load shedding challenges have highlighted the critical need for reliable power solutions. Solar backup power systems offer a robust answer, providing homeowners with independence from grid instability. But how exactly does this complex system come together to deliver seamless power? From mounting panels on your roof to integrating the inverter and battery bank with your existing electrical setup, the installation process is a precise operation that demands expertise and adherence to safety standards.
Let's break down the step-by-step process of installing a solar backup power system, offering insights from experienced installers across the country.
The Foundation: Site Assessment and System Design
Before any physical work begins, a thorough site assessment and meticulous system design are paramount. This isn't just about placing panels; it's about optimising your system for maximum efficiency and ensuring it meets your specific energy needs.
- Energy Audit and Needs Assessment: Our expert service providers often share stories of initial consultations where homeowners underestimate their power consumption. "One client, convinced they only needed enough power for basic lights, quickly realised they also wanted their TV, Wi-Fi, and fridge running during outages," recounted a seasoned installer from Pretoria. "A detailed energy audit, looking at appliance wattages and daily usage, is non-negotiable." This assessment helps determine the ideal size for your solar panel array and battery bank.
- Site Evaluation: This involves assessing your roof's structural integrity, orientation, and potential shading from trees or neighbouring buildings. In South Africa, north-facing roofs are generally ideal for optimal sunlight exposure. If roof space is limited or unsuitable, ground-mounted systems can be a viable alternative. Installers use specialised tools to map sun paths and identify any obstructions that could impact energy generation.
- Permits and Approvals: Navigating local regulations is a crucial, often overlooked, step. Depending on your municipality and the size of your system, you may need specific permits and approvals before installation can commence. This ensures compliance with local bylaws and national standards like SANS 10142-1-2 for electrical installations.
The Core Components: Solar Panels, Inverter, and Battery
Understanding the main components is key to appreciating the installation process.
- Solar Panels (Photovoltaic or PV Panels): These are the workhorses, converting sunlight directly into DC (Direct Current) electricity.
- Inverter: This crucial device transforms the DC electricity from your solar panels and batteries into AC (Alternating Current) electricity, which is what your home appliances use. Hybrid inverters are commonly used in backup systems as they manage power flow between solar panels, batteries, the grid, and your home's loads.
- Battery Bank: This stores excess solar energy generated during the day for use at night or during load shedding. Lithium-ion batteries (specifically LiFePO4) are increasingly popular in South Africa due to their longevity, efficiency, and depth of discharge.
- Charge Controller (Often integrated into the inverter): This regulates the flow of electricity from the solar panels to the batteries, preventing overcharging and prolonging battery life.
- Mounting System: This provides the structural support for the solar panels, securely attaching them to your roof or a ground-mounted frame.
- Cabling and Electrical Protection: High-quality DC and AC cabling, circuit breakers, and surge protection devices are essential for safety and efficient power transfer.
Step-by-Step Installation: Bringing Your Solar System to Life
Once the design is finalised and approvals are in place, the physical installation begins. This is where the expertise of certified electricians and solar installers truly shines.
1. Mounting the Racking System
The first physical step involves installing the mounting framework for the solar panels.
- Roof Preparation: This includes any necessary waterproofing and ensuring the roof surface is clean and ready.
- Racking Installation: The mounting rails are securely attached to the roof's rafters or a ground-mounted structure, ensuring proper spacing and angle for optimal sun exposure. Installers take great care to seal all roof penetrations to prevent leaks, a common concern homeowners raise. "We always double-check our waterproofing on roof installations, especially in areas prone to heavy rain," shared an installer from Durban, emphasizing the importance of diligence.
2. Installing the Solar Panels
With the racking in place, the solar panels are carefully lifted and secured onto the frame.
- Panel Placement: Each panel is precisely positioned and fastened to the mounting rails.
- Initial DC Wiring (Stringing): Panels are connected to each other in "strings" (series) or "arrays" (parallel) using specialised MC4 connectors. The configuration depends on the inverter's requirements and the overall system design. This part of the wiring carries high-voltage DC electricity.
3. Inverter Installation and DC Wiring from Panels
The inverter is the heart of your solar system and needs to be installed in a suitable, well-ventilated location, often near your main electrical distribution board.
- Inverter Mounting: The inverter is securely mounted to a wall or frame.
- DC Cabling: The DC wiring from the solar panels is routed to the inverter. This involves running appropriate gauge DC cables, ensuring they are protected from weather and physical damage, and complying with electrical safety standards. Proper cable management is crucial to avoid chafing and potential hazards.
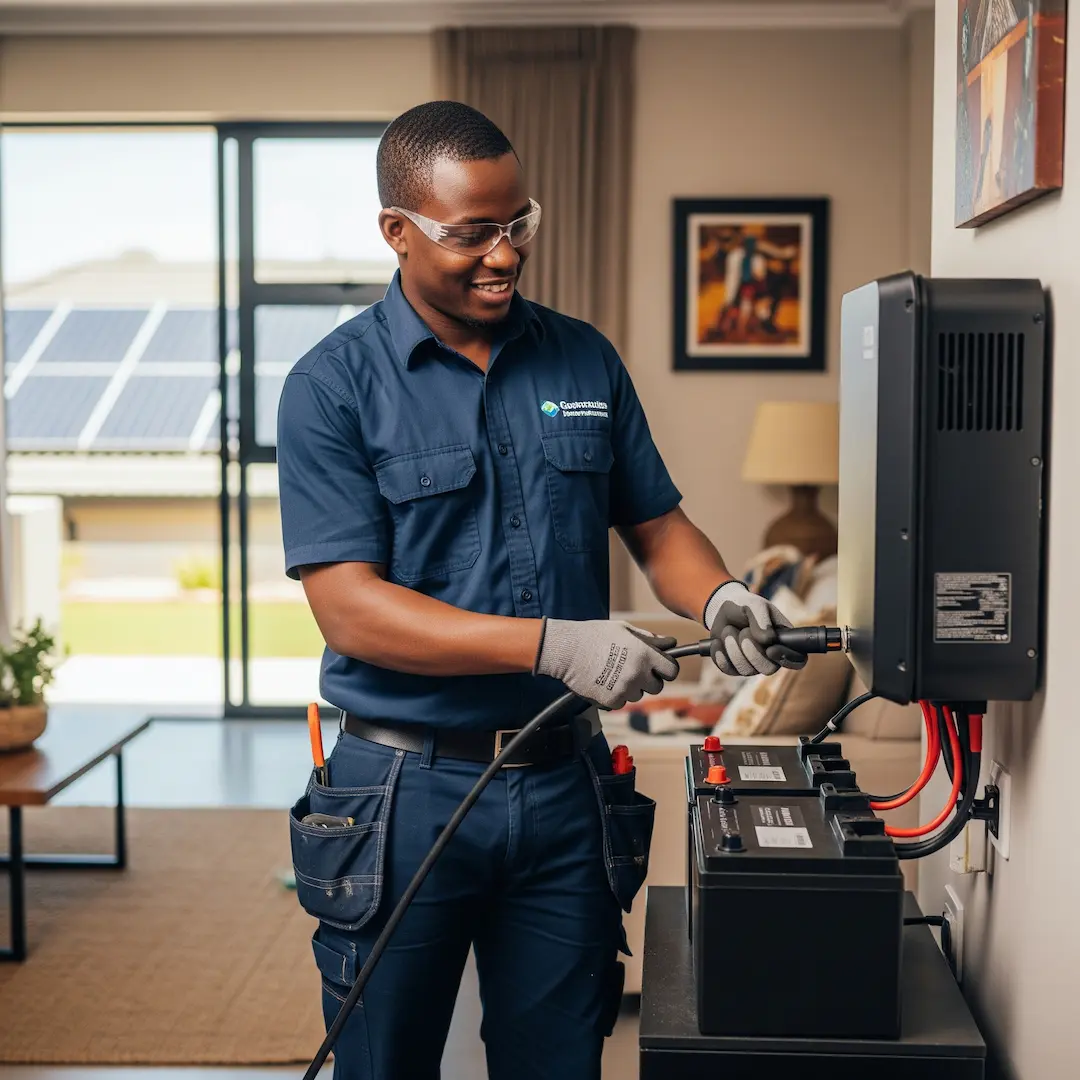
4. Battery Bank Connection
For backup power, the battery bank is integrated into the system.
- Battery Placement: Batteries are heavy and require a cool, dry, and well-ventilated area, often a garage or dedicated battery room. Proper ventilation is critical for some battery types, though modern lithium-ion batteries are sealed.
- Battery Wiring: The battery modules are connected to each other (in series or parallel depending on the desired voltage and capacity) and then to the inverter. This involves heavy-gauge DC cabling due to the high currents involved. "Ensuring correct polarity and secure terminals on the battery bank is paramount," advised a Cape Town-based technician. "A mistake here can lead to serious damage or fire."
- Battery Management System (BMS): Most modern lithium batteries come with an integrated BMS, which monitors and manages battery performance, ensuring safety and longevity.
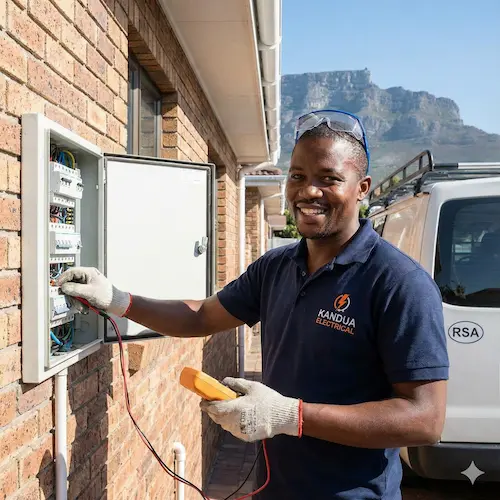
5. AC Wiring and Integration with Home Electrical System
This is where the solar backup system connects to your home's existing electrical infrastructure.
- AC Output from Inverter: The inverter's AC output is connected to your home's main distribution board (DB board) via a dedicated circuit breaker.
- Changeover Switch/Automatic Transfer Switch (ATS): For seamless backup during load shedding, an automatic transfer switch (ATS) is installed. This device automatically switches your home's power supply from the grid to the solar system (and vice-versa) when the grid goes down or comes back up. This eliminates the need for manual intervention during power outages.
- Earthing and Surge Protection: Proper earthing of the entire system and installation of surge protection devices are critical for safeguarding your investment and your home from lightning strikes and power surges. This aligns directly with SANS 10142-1-2 standards for electrical installations.
6. Commissioning and Testing
Once all components are installed and wired, the system undergoes rigorous testing to ensure it's functioning correctly and safely.
- System Checks: Installers verify all connections, check voltage and current readings, and confirm that all safety mechanisms are in place.
- Inverter Configuration: The inverter is programmed with the necessary settings, including grid parameters, battery charging profiles, and load management.
- Performance Verification: The system is switched on, and its performance is monitored to ensure it's generating power as expected, charging the batteries, and seamlessly transferring loads.
- Certificate of Compliance (CoC): A certified electrician issues a Certificate of Compliance (CoC) for the electrical installation, confirming that it meets all regulatory requirements and safety standards in South Africa. This is a non-negotiable document.
After Installation: Monitoring and Maintenance
While the initial installation provides the solution, ongoing monitoring and periodic maintenance ensure your solar backup system continues to operate efficiently for years to come. Many modern inverters offer online monitoring, allowing you to track your system's performance via an app or web portal. Regular checks of connections, cleaning of solar panels, and professional servicing can maximise energy production and extend the lifespan of your investment.
Disclaimer: While this guide provides a comprehensive overview of the solar backup power installation process, DIY attempts are strongly discouraged. Working with electricity, especially high-voltage DC and AC systems, can be extremely dangerous and can lead to severe injury, electrocution, fire, or damage to your property. Always entrust solar installations to qualified, certified electricians and solar specialists who understand and adhere to all South African safety standards and regulations.
Frequently Asked Questions
How long does a typical solar backup power installation take?
The installation time can vary significantly depending on the size and complexity of the system. For an average residential solar backup power installation (panels, inverter, batteries), it typically takes between 1 to 3 days. Larger or more complex systems, especially those requiring extensive roof modifications or ground mounts, might take longer.
Can I expand my solar backup system later if my energy needs increase?
Yes, most solar backup power systems are designed with scalability in mind. It's often possible to add more solar panels, increase battery storage capacity, or even upgrade your inverter to accommodate growing energy demands. Discussing future expansion possibilities with your installer during the initial design phase is a good idea.
What maintenance is required for a solar backup power system?
Solar panels require minimal maintenance, usually just occasional cleaning to remove dust, dirt, or debris that might reduce efficiency. Batteries should be checked periodically, though modern lithium-ion batteries are largely maintenance-free. It's recommended to have a professional inspect your entire system at least once a year to ensure all components are functioning optimally and safely.
How long do solar panels and batteries typically last in South Africa?
High-quality solar panels generally have a lifespan of 25 to 30 years, with manufacturers often offering performance warranties for this period. Lithium-ion batteries used in solar backup systems typically last 10 to 15 years, or more, depending on their cycle life and how they are used and maintained. Factors like temperature and depth of discharge can influence battery longevity.
Suzette Meyer is the lead author and content creator for Kandua.com, South Africa’s #1 marketplace for home services. Suzette has made it her mission to help homeowners with advice on all aspects of home repair, maintenance and improvement, including how to choose the right Pro and how to make smart upgrades that improve your resale value or save costs.

Related articles, advice and more
.webp)
How to Check If an Electrician Is Registered with ECB
The Electrical Conformance Board of South Africa (ECB) serves as a vital gatekeeper in this industry. If you are in the middle of a renovation or just need a new DB board installed, knowing how to verify your electrician’s registration is the most important step you can take.
What to Do If You Smell Burning from an Electrical Outlet
For South African homeowners, electrical faults are a leading cause of house fires. Whether it is caused by old wiring in heritage homes in suburbs like Melville or Observatory, or the strain placed on systems by post-load shedding surges, knowing exactly how to react can save your property and your life.This guide details the immediate steps you must take, the likely causes of the smell, and what to expect when you call in a professional.
.webp)
.webp)
.webp)
Your Inverter is Repaired! Key Checks to Ensure Continued Backup Power in SA
This guide will walk you through the essential checks and maintenance tips to maximise the lifespan and efficiency of your recently repaired inverter and battery setup, straight from the insights of experienced electricians across South Africa.
.webp)
.webp)
.webp)
Latest articles, advice and more
%20(1).webp)
The Most Common Plumbing Issues in South African Homes
Owning a home in South Africa often feels like a full-time job. Between managing power outages and keeping the garden tidy, the last thing you need is a mysterious puddle forming in the passage or a geyser that suddenly goes cold. When plumbing problems arise, they usually do so without an invitation, leaving many homeowners feeling as if they are taking a high-stakes gamble about what to do next.
%20(1).webp)
%20(1).webp)
How to Check If an Electrician Is Registered with ECB
The Electrical Conformance Board of South Africa (ECB) serves as a vital gatekeeper in this industry. If you are in the middle of a renovation or just need a new DB board installed, knowing how to verify your electrician’s registration is the most important step you can take.
.webp)
What Does a Plumbing Call-Out Fee Usually Include?
When that familiar drip-drip-drip starts under the kitchen sink or your geyser begins a slow weep in the ceiling, the first thing most South African homeowners do is pick up the phone. But before a wrench even touches a pipe, you’ll likely hear the term "call-out fee."
.webp)
Beyond the Unboxing: A Detailed Guide to Correct Washing Machine Plumbing & Setup
New washing machine in South Africa? Learn essential plumbing and setup tips to prevent leaks, ensure efficient operation, and extend your appliance’s lifespan - expert advice before your first load.
.webp)
New Washing Machine? Don't Plug It In Yet! Essential Installation Tips for SA Homes
Installing a new washing machine? Learn the essential setup steps South African homeowners often overlook to prevent leaks, noise, and damage—and ensure efficient, long-lasting performance from day one.
.webp)
TV Repair Costs in South Africa: Diagnosing Screen, Power & Component Issues
Find out what TV repairs really cost in South Africa – from call-out and diagnosis fees to screen, power and main board fixes – and when it’s cheaper to replace your TV instead of repairing it.
.webp)
Septic Tank Leak Repair Cost in South Africa: Addressing Odours & Environmental Hazards
Learn typical septic tank leak repair costs in South Africa, what drives the price up, how to spot early warning signs (odours, soggy ground, backups), and when it’s safer and cheaper to get a professional in.
.webp)
Hidden Water Leak Detection Cost in South Africa: Non-Invasive Solutions
Discover what hidden water leak detection really costs in South Africa – from acoustic and thermal imaging to tracer gas – and when it’s worth calling a non-invasive leak detection specialist to avoid massive water damage and repair bills.
How to Install a Horizontal Geyser | Step-by-Step Pro Guide
Want to install a geyser like a pro? This step-by-step tutorial shows you exactly how to do a horizontal Ariston Axios geyser installation, straight from the BluLever plumbing workshop. 🎥 Hosted by MK, BluLever’s technical facilitator, and supported by a qualified electrician, Life and a BluLever graduate artisan, Zinhle. This is your ultimate guide to a SANS 10254-compliant installation — from preparing the wall, to plumbing, electrical wiring, and pro troubleshooting tips.
How to Maintain a Geyser | Step-by-Step Pro Guide
Want to maintain a geyser like a pro? This step-by-step tutorial shows you exactly how to do the three core geyser maintenance checks on an Ariston Axios geyser installation, straight from the BluLever plumbing workshop. 🎥 Hosted by MK, BluLever’s technical facilitator, and supported by a qualified electrician, Life. This is your ultimate guide to geyser maintenance — from diagnosing the problem to checking the heat regulation of the geyser, to pressure regulation and then finally corrosion protection.
%201.avif)
Not just another newsletter. It's an advantage


From problem to solved


.svg)