
Your New Garage Motor in SA: Post-Installation Care for Safety & Smooth Operation
New garage motor installed in South Africa? Discover essential post-installation care tips to ensure smooth operation, long-term reliability, and safety - expert advice to protect your investment.

Your New Garage Motor in SA: Post-Installation Care for Safety & Smooth Operation
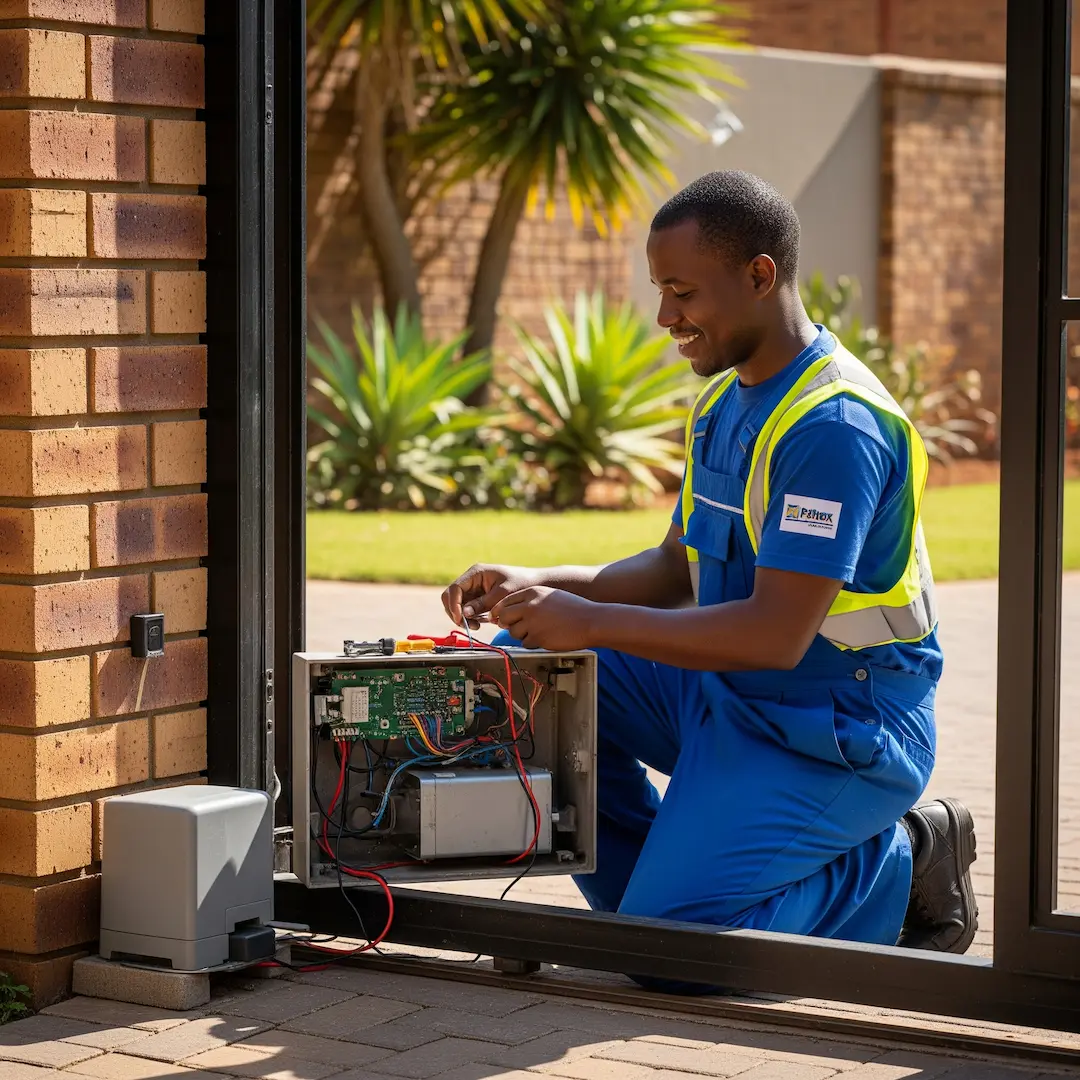
So, you’ve just had a brand-new garage motor installed – excellent choice for convenience and security! But the journey doesn't end with the installation. To ensure your new motor operates smoothly, safely, and reliably for years to come, some post-installation care and regular maintenance are crucial. Think of it like a new car: you wouldn’t just drive it off the lot and never service it, would you?
Proper maintenance not only extends the lifespan of your garage motor but also helps prevent potential safety hazards and costly repairs down the line. We've gathered insights from experienced electricians and garage door specialists across South Africa to bring you this essential guide.
Understanding Your Garage Motor System
Before we dive into the specifics of maintenance, it's helpful to understand the basic components of your garage motor system. This typically includes:
- The Motor Unit: The brain of the operation, usually mounted to the ceiling, which powers the door's movement.
- Tracks: The metal rails along which the garage door moves, crucial for smooth operation.
- Rollers: Wheels that fit into the tracks, allowing the door to glide up and down.
- Springs: Torsion or extension springs that counterbalance the weight of the door, making it easier for the motor to lift.
- Cables: Attached to the springs and the bottom of the door, these lift and lower the door.
- Photoelectric Sensors (Safety Beams): These small devices, usually located near the bottom of the door opening, detect obstructions and prevent the door from closing on them.
- Remote Controls/Keypads: For convenient operation.
Each of these components plays a vital role, and proper care ensures they all work in harmony.
Essential Post-Installation Maintenance Checks
Once your garage motor is installed, it’s a good practice to perform a few initial checks and then establish a regular maintenance routine.
1. Initial Inspection: What to Look Out For
Even after a professional installation, a quick visual check can give you peace of mind.
- Secure Mounting: Ensure the motor unit is firmly attached to the ceiling joists or a secure mounting bracket. There should be no wobbling or excessive movement when the door operates.
- Track Alignment: The tracks should be perfectly vertical and parallel to each other. Any visible bends or misalignments can lead to jerky operation or even derailment.
- Cable Tension: The cables should appear taut and correctly wound around their drums or pulleys. Fraying or slack cables are a serious safety concern.
- Sensor Alignment: The safety beams should be facing each other directly, with no obstructions in their path. You'll typically see a small indicator light on one or both sensors when they're correctly aligned and communicating.
- Smooth Operation: Operate the door several times using your remote. Listen for any unusual grinding, squealing, or scraping noises. The movement should be fluid and relatively quiet.
2. Cleaning the Tracks
One of the simplest yet most effective maintenance tasks is keeping the garage door tracks clean. Over time, dust, dirt, small stones, and even spiderwebs can accumulate in the tracks, hindering the smooth movement of the rollers.
- How to do it: With the garage door closed and the motor disengaged (if possible, refer to your motor's manual for disengagement instructions), use a dry cloth or a stiff brush to wipe down the inside of the tracks. Pay attention to any build-up in the corners or along the bottom. You can also use a vacuum cleaner with a brush attachment to remove loose debris. Avoid using water or harsh chemicals, as they can lead to rust.
- Frequency: Aim to do this every 2-3 months, or more often if your garage is particularly dusty.
Our expert installers have often recounted how a simple build-up of gunk in the tracks was the culprit for a "faulty" motor call-out. It’s a classic example of how a small preventative step can save you a service fee!
3. Lubricating Moving Parts
Lubrication is key to reducing friction and wear on your garage door's moving components. This should be done carefully and with the correct products.
- What to lubricate:Rollers: Apply a silicone-based lubricant (or a dedicated garage door lubricant) to the ball bearings inside the rollers. Avoid using grease on nylon rollers, as it can attract dirt.
- Hinges: Lubricate the pivot points of all hinges.
- Springs (Torsion & Extension): A light coat of lubricant can help reduce noise and extend their life.
- Bearings/Pulleys: Apply lubricant to any visible bearings or pulleys.
- What NOT to lubricate: Do not lubricate the garage door tracks, especially if you have a belt-drive motor. Lubricant on the tracks can attract dirt and cause more problems. Similarly, avoid using WD-40 on your garage door components, as it can attract dust and actually dry out parts over time.
- How to do it: Use a spray lubricant with a straw attachment for precise application. Wipe off any excess.
- Frequency: Every 6-12 months, depending on usage.
"Many homeowners overlook the power of proper lubrication," says one of our trusted technicians from Johannesburg. "A well-lubricated system not only runs quieter but also puts less strain on the motor, leading to fewer breakdowns."
4. Testing Safety Features: The Auto-Reverse Mechanism
This is arguably the most critical safety check you can perform. The auto-reverse mechanism is designed to prevent the garage door from closing on a person, pet, or object. SANS (South African National Standards) regulations, particularly SANS 10173, emphasize the importance of these safety features in automated gate and garage door systems.
- The Beam Test:Place a small, non-fragile object (like a cardboard box) directly in the path of the safety beams at the bottom of the garage door opening.
- Operate the door to close.
- The door should immediately stop and reverse when the beams are interrupted by the object. If it doesn't, do NOT attempt to use the door until a professional has inspected and repaired the sensors.
- The Pressure Test:Lay a soft, compressible object (like a roll of paper towel or a piece of pool noodle) flat on the garage floor directly in the path of the closing door.
- Operate the door to close.
- When the door makes contact with the object, it should stop and reverse immediately. If it continues to exert significant force or doesn't reverse, the pressure sensitivity may need adjustment or repair by a professional.
- Frequency: Test these safety features monthly. This is non-negotiable for the safety of your household.
5. Checking for Loose Hardware
Vibrations from daily operation can cause nuts, bolts, and screws to loosen over time.
- How to do it: Visually inspect all brackets, hinges, and the mounting hardware for the motor unit. If you see anything loose, carefully tighten it with a wrench or screwdriver. Be careful not to overtighten, especially on wooden structures.
- Frequency: Every 3-6 months.
6. Inspecting Cables and Pulleys
These components are under high tension and are crucial for safe operation.
- How to do it: Look for any signs of fraying on the cables, particularly near the bottom brackets or where they wrap around pulleys. Also, check the pulleys themselves for any wear, cracks, or misalignment.
- Warning: Garage door springs and cables are under extreme tension. NEVER attempt to repair or adjust these components yourself. Doing so can be extremely dangerous and lead to serious injury. If you notice any damage or wear, contact a qualified garage door technician immediately. This is one area where DIY is simply not worth the risk.
When to Call a Professional Electrician or Garage Door Specialist
While routine maintenance can be handled by a diligent homeowner, there are certain situations where professional intervention is essential.
- Motor Malfunctions: If your motor is making unusual noises, struggling to lift the door, or failing to operate consistently.
- Safety Feature Failures: If your auto-reverse mechanism or safety beams are not working correctly after your tests. This is a critical safety issue that needs immediate attention.
- Spring or Cable Issues: As mentioned, these are high-tension components that require expert handling.
- Track or Roller Damage: Dents, bends, or severe wear on tracks or rollers can impact door operation and safety.
- Electrical Problems: Any issues related to the motor's power supply, wiring, or controls should only be handled by a qualified electrician, ensuring compliance with SANS 10142-1 (the wiring code).
- Major Adjustments: If the door is significantly unbalanced, or the motor's limits need reprogramming, a professional is best equipped to handle these adjustments safely and correctly.
Professional installation is the foundation for a reliable garage door system. Many of the long-term issues we see stem from shortcuts taken during the initial setup," shares an experienced electrician from Durban. "Having it done right the first time significantly reduces future headaches and reinforces the system's overall safety."
By following these post-installation care guidelines, you'll not only extend the life of your new garage motor but also ensure the ongoing safety and security of your home and family. Regular, proactive maintenance is always more cost-effective and less stressful than emergency repairs.
Frequently Asked Questions
How often should I have my garage motor professionally serviced?
It's generally recommended to have your garage door and motor system professionally serviced at least once a year. This allows a qualified technician to perform a thorough inspection, identify potential issues, lubricate hard-to-reach parts, and make necessary adjustments that go beyond routine homeowner maintenance.
What kind of lubricant should I use for my garage door?
You should use a silicone-based spray lubricant or a dedicated garage door lubricant. These products are designed not to attract dust and dirt, which can gum up components over time. Avoid using petroleum-based lubricants like grease or WD-40, as they can cause more problems in the long run.
My garage door is making a lot of noise. What could be the cause?
Excessive noise can be due to several factors, including dry or unlubricated moving parts (hinges, rollers, springs), loose hardware, or dirt and debris in the tracks. Sometimes, it could also indicate an issue with the motor itself or an unbalanced door. Start by cleaning the tracks and lubricating the moving parts; if the noise persists, it's best to consult a professional.
Why is my garage door reversing seemingly randomly when it's closing?
If your garage door reverses unexpectedly when closing, it's most likely due to an obstruction detected by the safety beams or a sensitivity setting issue. First, check if anything is blocking the path of the safety beams (small spiders, leaves, or even direct sunlight can sometimes interfere). Ensure the lenses are clean. If the path is clear, the sensors might be misaligned, or the door's force sensitivity might need adjustment. This is a critical safety feature, so if you can't resolve it by clearing obstructions or cleaning the sensors, have a professional inspect it immediately.
Suzette Meyer is the lead author and content creator for Kandua.com, South Africa’s #1 marketplace for home services. Suzette has made it her mission to help homeowners with advice on all aspects of home repair, maintenance and improvement, including how to choose the right Pro and how to make smart upgrades that improve your resale value or save costs.

Related articles, advice and more
.webp)
How to Check If an Electrician Is Registered with ECB
The Electrical Conformance Board of South Africa (ECB) serves as a vital gatekeeper in this industry. If you are in the middle of a renovation or just need a new DB board installed, knowing how to verify your electrician’s registration is the most important step you can take.
What to Do If You Smell Burning from an Electrical Outlet
For South African homeowners, electrical faults are a leading cause of house fires. Whether it is caused by old wiring in heritage homes in suburbs like Melville or Observatory, or the strain placed on systems by post-load shedding surges, knowing exactly how to react can save your property and your life.This guide details the immediate steps you must take, the likely causes of the smell, and what to expect when you call in a professional.
.webp)
.webp)
.webp)
Your Inverter is Repaired! Key Checks to Ensure Continued Backup Power in SA
This guide will walk you through the essential checks and maintenance tips to maximise the lifespan and efficiency of your recently repaired inverter and battery setup, straight from the insights of experienced electricians across South Africa.
.webp)
.webp)
.webp)
Latest articles, advice and more
%20(1).webp)
%20(1).webp)
How to Check If an Electrician Is Registered with ECB
The Electrical Conformance Board of South Africa (ECB) serves as a vital gatekeeper in this industry. If you are in the middle of a renovation or just need a new DB board installed, knowing how to verify your electrician’s registration is the most important step you can take.
.webp)
What Does a Plumbing Call-Out Fee Usually Include?
When that familiar drip-drip-drip starts under the kitchen sink or your geyser begins a slow weep in the ceiling, the first thing most South African homeowners do is pick up the phone. But before a wrench even touches a pipe, you’ll likely hear the term "call-out fee."
.jpg)
How to Choose Between Repair and Replacement for Your Geyser
Deciding between repairing and replacing isn't just about the immediate price tag. It is about safety, long-term electricity savings, and compliance with South African building regulations. Based on insights from vetted plumbers across Johannesburg, Cape Town, and Durban, this guide will help you navigate that decision with confidence.
.webp)
Beyond the Unboxing: A Detailed Guide to Correct Washing Machine Plumbing & Setup
New washing machine in South Africa? Learn essential plumbing and setup tips to prevent leaks, ensure efficient operation, and extend your appliance’s lifespan - expert advice before your first load.
.webp)
New Washing Machine? Don't Plug It In Yet! Essential Installation Tips for SA Homes
Installing a new washing machine? Learn the essential setup steps South African homeowners often overlook to prevent leaks, noise, and damage—and ensure efficient, long-lasting performance from day one.
.webp)
TV Repair Costs in South Africa: Diagnosing Screen, Power & Component Issues
Find out what TV repairs really cost in South Africa – from call-out and diagnosis fees to screen, power and main board fixes – and when it’s cheaper to replace your TV instead of repairing it.
.webp)
Septic Tank Leak Repair Cost in South Africa: Addressing Odours & Environmental Hazards
Learn typical septic tank leak repair costs in South Africa, what drives the price up, how to spot early warning signs (odours, soggy ground, backups), and when it’s safer and cheaper to get a professional in.
.webp)
Hidden Water Leak Detection Cost in South Africa: Non-Invasive Solutions
Discover what hidden water leak detection really costs in South Africa – from acoustic and thermal imaging to tracer gas – and when it’s worth calling a non-invasive leak detection specialist to avoid massive water damage and repair bills.
How to Install a Horizontal Geyser | Step-by-Step Pro Guide
Want to install a geyser like a pro? This step-by-step tutorial shows you exactly how to do a horizontal Ariston Axios geyser installation, straight from the BluLever plumbing workshop. 🎥 Hosted by MK, BluLever’s technical facilitator, and supported by a qualified electrician, Life and a BluLever graduate artisan, Zinhle. This is your ultimate guide to a SANS 10254-compliant installation — from preparing the wall, to plumbing, electrical wiring, and pro troubleshooting tips.
How to Maintain a Geyser | Step-by-Step Pro Guide
Want to maintain a geyser like a pro? This step-by-step tutorial shows you exactly how to do the three core geyser maintenance checks on an Ariston Axios geyser installation, straight from the BluLever plumbing workshop. 🎥 Hosted by MK, BluLever’s technical facilitator, and supported by a qualified electrician, Life. This is your ultimate guide to geyser maintenance — from diagnosing the problem to checking the heat regulation of the geyser, to pressure regulation and then finally corrosion protection.
%201.avif)
Not just another newsletter. It's an advantage


From problem to solved


.svg)